Categories
Blog

Tips For Front Squats: Destroyer of Weakness

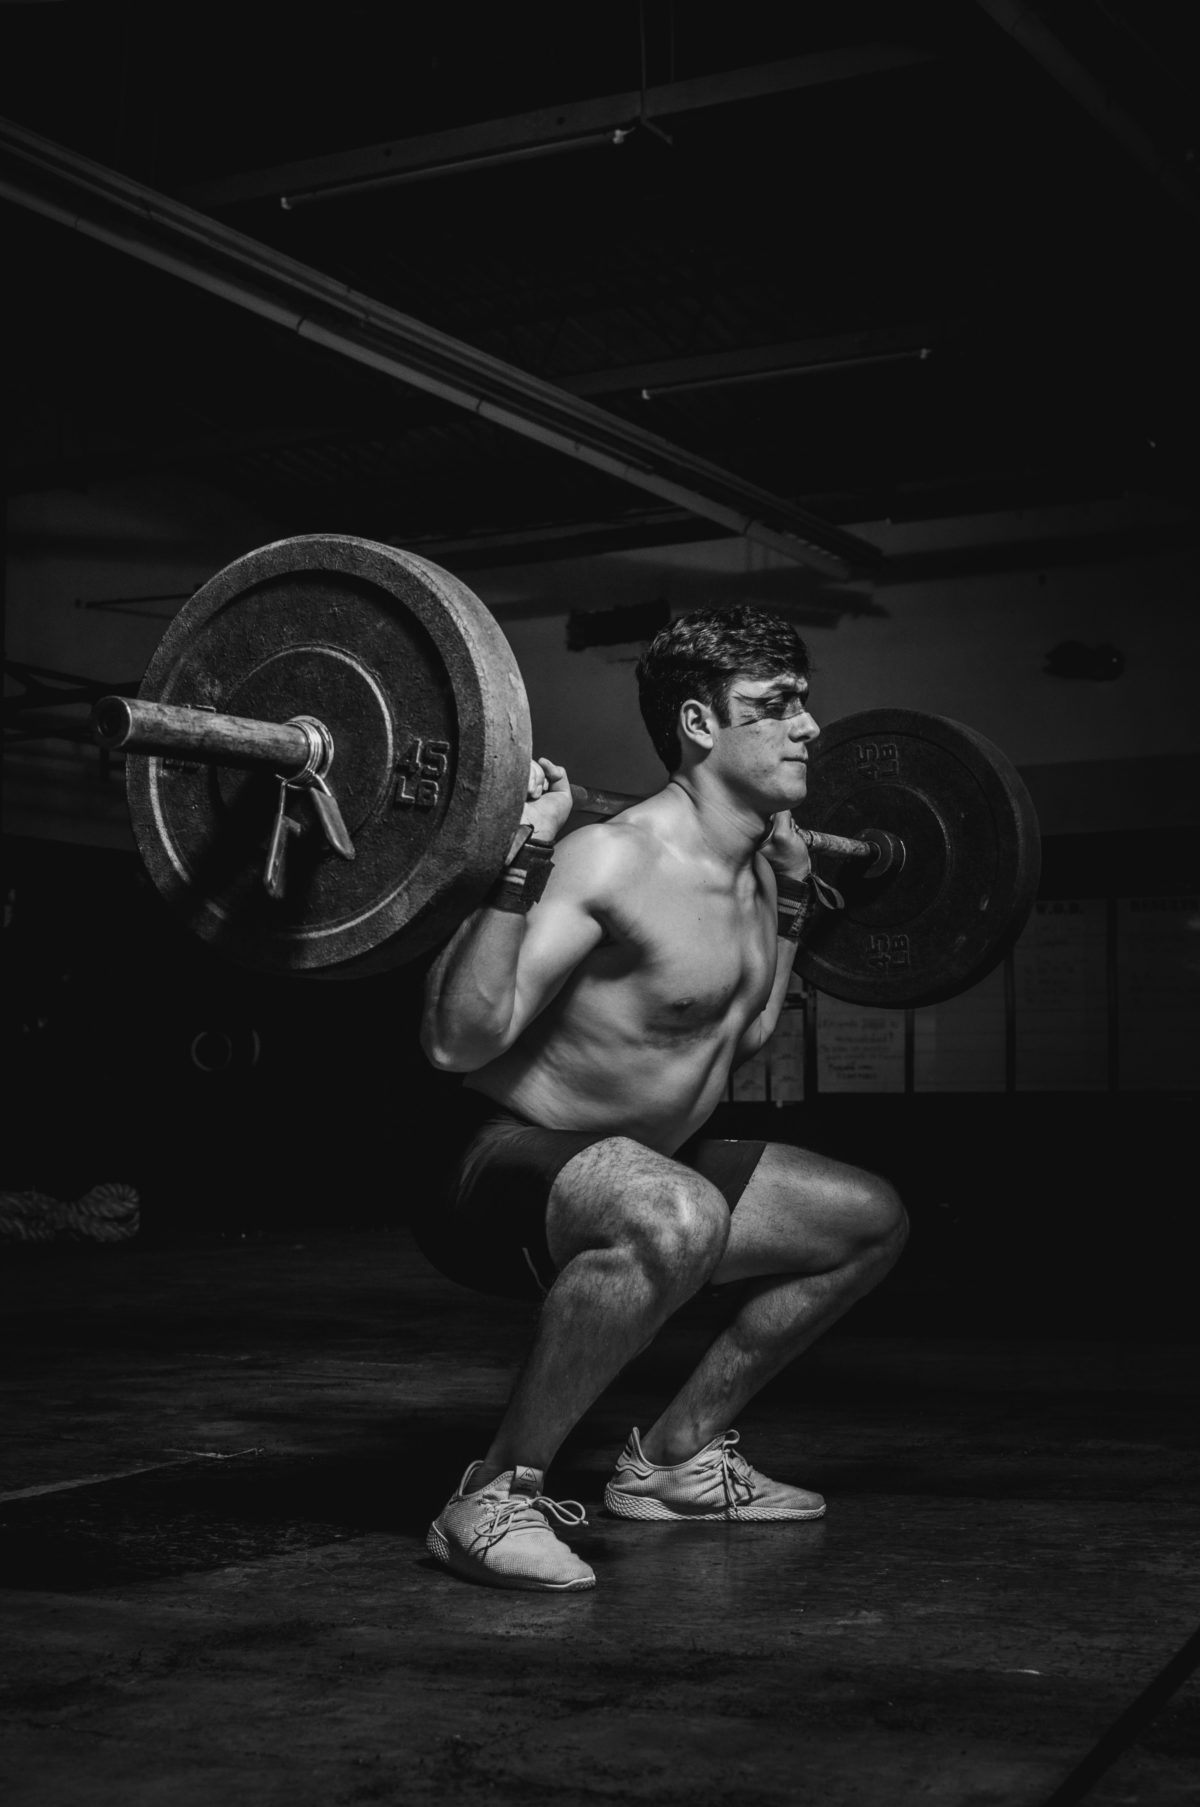
The front squat is one of the ultimate movements to expose an athletes weaknesses. It is also one of the best exercises to destroy those weaknesses and improve strength, balance, and mobility. You may find some tips for front squats useful as you continue to train.

If you know me, you know I am a fan of Zercher squats, which you can read about here. I also love front squats. Okay, I don’t really enjoy them that much but they are some of the best squats a person can do. Here are some reasons why, and some tips for front squats.

Why this movement is important

Weaknesses

A person’s back squat can be “cheated”. The weight being placed on the back of the shoulders helps balance a person. It also helps align the bar more directly over the mid-foot allowing the athlete to move more weight. 

There is less emphasis on core stability which means a beginner athlete should be able to load a back squat heavier. The front squat will illuminate weakness in the core, shoulders, back, and obviously the legs. It also will also paint a more detailed picture of an athlete’s mobility or lack thereof.

Safety

As the name implies, during the front squat the bar is in the front rack position and will fall to the ground. This means it will rest on the clavicle, the shoulders, and in the palms. 

If done correctly an excessive amount of forward lean and the bar will not be able to maintain its position. This acts the same way as a rev limiter on an engine. 

Someone who has incorrect front squat posture will be unable to squat heavy weight in the front squat. Therefore, the front squat is arguably safer than the back squat

Posture

While we are talking about posture, the front squat can help us desk-bound humans with our sloppy posture.

As an athlete becomes more advanced at the front squat their posture should improve more. Since the front squat requires more core strength, and a more upright torso, then these muscles are made stronger. This means your posture in daily life should improve as well.

Shoulder health

Nice smooth, supple shoulders will help you feel more confident in the front squat position. 

Mobility is a use it or lose it skill set. We are born with amazing mobility. Watch a small child move and you will see what I mean. Over our life most of us will lose mobility and range of motion. The good news is we are usually able to gain it back! 

One way to help that mobility is the front squat.  Ideally, we want the elbows to be pointed forward when we are in the front squat position, triceps should be parallel to the ground. 

If this isn’t the case for you, don’t be too down on yourself. Simply by attempting the front squat you are doing more mobility work than the large majority of people in the world. Here are some good ways to get started on mobility work, to kick you off in the right direction.

Simple tips for front squats:

  • Focus on range of motion instead of increasing weight quickly.
  • Make sure your heels stay on the ground.  The weight will try to pull you forward, by focusing on your heels you should be able to keep the chest more upright.
  • Find what width of grip feels comfortable on the bar.
  • Using pauses and tempos will help build a strong front squat without the need to increase weight.
  • If you have trouble getting the hips down and keeping the torso up, focus on ankle and hip mobility drills.
  • Balanced athletes should have a front squat that is roughly 85% of their back squat. If yours is less than that you should focus on increasing quad strength.
  • Use your elbows to lead you out of the bottom of the front squat.  Pushing your elbows up will help your torso open and your chest rise before the hips.

Want more tips for front squats? Set up your free No Sweat Intro with us today and start improving.

Categories
Blog

Can I Build Muscle With Bodyweight Exercises?

Bodyweight exercises can get a bit of a bad rap in fitness circles. However, it is most certainly possible to build muscle with bodyweight exercises. Well, up to a point anyway. But regardless of your level of fitness, these functional movements almost always make a valuable addition to your workout regimen. 

They’re a perfect warm up or cool down. They combine cardio with strength building. They’re almost endlessly customizable. Plus, you can do them anywhere you want, anytime you want. What’s not to like?

How Does The Body Build Muscle With Bodyweight Exercises?

Muscles are mostly built by microtrauma. This is the proper name for the tiny tears your muscles get when you exercise. As the muscles grow back, they come back stronger than ever before – meaning visible gains. 

Depending on your level of fitness, bodyweight exercises may be enough to cause microtrauma to your muscle fibers. If you’re a beginner, you’re unlikely to need weighted resistance to make gains. 

Even if you’re already pretty ripped, there are many challenging bodyweight exercises that will be a great addition to your workout routine. They’ll help you get toned, get your heart rate up, and build your muscular endurance.

Which Bodyweight Exercises Will Give Me The Best Gains?

You’re spoiled for choice when you’re aiming to build muscle with bodyweight exercises. You have many options, and there are lots of great resources online to point you in the right direction. Here are some classic bodyweight exercises to use as a jumping off point.

  • Pull ups. This bodyweight movement is so challenging many people can’t even do one. They’re a great way to work your upper back – particularly the lats.
  • Planks. Even though you’re simply staying still in a prone position, this is a deceptively challenging ab exercise. When performing planks, make sure to keep your body in a super straight prone position for best results.
  • Push ups. These are a classic. From your plank position, simply bend your arms to lower yourself closer to the floor. Then, straighten your arms to raise yourself up again. If you find push ups too challenging, try doing them on your knees. If you find them too easy, there are countless modifications to make them more difficult.
  • Squats. These are a great compound exercise that works a big range of muscles in your legs, glutes and core. You can make them harder by doing jump squats, or one legged squats.
  • Dips. You can do these off of the side of a bench or chair. Dips are an excellent way to target your triceps and chest.
  • Lunges. These are a great way to work your quads, hamstrings and glutes. You can do them stepping forwards, stepping backwards, or to the side. Many people also enjoy walking lunges.
  • Calf raises. Calves are a famously forgotten muscle group, so don’t neglect them! This movement is super simple – just raise up on your toes and squeeze your calf muscles at the top, before lowering your heels back to the floor.

How To Maximize The Benefits Of Bodyweight Exercises?

There are many ways to get the most out of your bodyweight exercises. You can try:

  • Increasing tempo. Playing around with tempo is a great way to increase the benefits of your workout. Speeding up will get your heart pumping and help you break a sweat. Slowing down the movement will increase the time under tension, which will boost your muscle gains.
  • Doing more reps and sets. If you’re finding a movement is becoming a bit easy, simply doing more of them is a great way to challenge yourself.
  • Decreasing rest times. This is a particularly great technique if you want to reap maximum cardio benefits from your bodyweight exercises. Decreasing rest times is a straightforward way to increase your heart rate and maximize the cardiovascular benefits.
  • Adding holds. Try adding a pause at the highest tension point of your exercise. You’ll be surprised how much putting the muscle under tension for a longer period of time intensifies the movement.
  • Switching to single-sided movements. You know what’s harder than a plank? A plank with one arm tucked behind your back. Single side exercises are a great way to make your bodyweight exercise more challenging.
  • Try a WOD or a circuit. CrossFit WODs or circuit training are great ways to get your bodyweight exercises in. These workouts are specifically designed to maximize the burn and get great results from your workout. Join a group fitness class geared toward bodyweight exercises, or simply do some quick research and find a plan yourself.

What About When I Can’t Build Muscle With Bodyweight Exercises Anymore?

Once your body can comfortably lift itself, you’ll stop being able to build muscle with bodyweight exercises. If you can do twenty or thirty push ups without breaking a sweat or feeling much strain, it’s time to switch up what you’re doing. Otherwise, you’ll see a stall in your gains.

A straightforward way to get back to building muscle is to add some weight. Use your increased upper body strength to move into bench presses. The added resistance will get you back on track.

Or, if you don’t have access to weights or you just don’t want to use them, you can also modify the exercise. In the case of push ups, there are many great modifications. You could try spiderman push-ups, scorpion push-ups or clapping push-ups, to name a few. Do some research and find new, challenging bodyweight exercises.

Categories
Blog

Keeping High Intensity Workouts Sustainable

High intensity and CrossFit go together like shoelaces. In fact, ask someone who has recently gotten their L1 (CrossFit’s base coaching certificate) what CrossFit is and they will likely tell you it is constantly varied functional movements performed at high intensity. It is CrossFit’s claim to fame – being able to do more work in less time. We manage to make high intensity workouts sustainable, and an effective method for working out.

Why it works

The nice thing is that high intensity can be different to everyone. An 85 year old who has never worked out a day in their life might squat to a tall box 20 times and have an elevated heart rate. For them, this is high intensity. 

Meanwhile a 23 year old athlete might do 20 full depth squats with 250 lbs and get the same elevated heart rate. This is high intensity for them. That is why CrossFit has the ability to change lives. It can be applied over a broad spectrum of people and abilities.

High intensity works great for fat loss, muscle building and getting more done in less time. If you have ever seen a track sprinter and a cross country runner next to each other you know what I mean. The cross country runner usually looks malnourished and the sprinter looks like a bodybuilder.

There’s always a downside

However as with all good things there is a downside to high intensity workouts. It simply is not sustainable.

Your heart rate can only stay so high for so long. And the higher it stays, the shorter amount of time it can stay that way. Even professional athletes can only maintain their true 100% for a few minutes before they have to break or reduce that level of intensity.

It’s similar to miles per gallon and RPMs of an engine. The higher the RPMs the fewer miles per gallon it will go. There needs to be some kind of trade off.

How to make high intensity workouts sustainable

So how do we keep intensity high without having to slow down? This is where the popular abbreviation HIIT comes in. HIIT stands for high intensity interval training.  

Here is how it works. You work really hard for a short period of time and then rest. You do this over and over again, usually in a predetermined amount of time.

One of the most famous ways to do this is Tabatas. Ta-whata’s??? Tabatas. Tabata is named after Dr. Izumi Tabata, who we will talk about in a different article. Basically, he studied HIIT and came up with a 20 sec of work to 10 sec of rest ratio.

Typically this is done 8 times back to back. Tabatas are great because 20 seconds of work is not a long time and most people can work very hard for that little amount of time.  10 seconds of rest is just enough time to catch a couple of breaths.  

If you have never done a tabata or multiple rounds of a tabata then you are probably looking at 20 seconds of work like a joke. Trust me, it is not.  You will soon be wondering how 20 seconds is so difficult and why you are sweating so much.

Tabatas are just one way to use HIIT. You can stretch the work and rest time out to be longer but the idea is to keep the work time short enough to where you can consistently produce high levels of intensity. 

So as effective as high intensity is, resting during your WOD can be equally important. This is a key way to make your high intensity workouts sustainable.

Categories
Blog

What Would Happen If I Did Pull Ups Every Day?

Pull ups are the classic back exercise. You probably learned to do them as a kid, but they’re a useful addition to a workout routine at any stage of life. They’re challenging, require minimal equipment, and are awesome for developing muscle and strength. You’ve surely seen trends of “100 Pull Ups Every Day For A Month” or similar. If you really enjoy this movement and see great results from it, you might be wondering what would happen if you tried doing pull ups every day.

There are some real pros and cons to doing, well, any movement each and every single day. This is particularly true of an exercise as intense and challenging as pull ups.

Let’s say you decided to do 50 pull ups every day for three months. Here are some results you could expect to see. Some are good. Some…not so much. 

You’ll Get (Way, Way) Better At Pull Ups

Pull ups are hard. Many people can’t even do a single one. At the start of your pull up challenge, you may only be able to complete five or so at a time. But, if you dedicate yourself to doing pull ups every day, you’ll quickly start seeing improvements. You may even get to a point where you can do all 50 in a row. That’s bound to feel good.

Your Back Will Gain Some Impressive Lean Muscle

This movement mostly targets your lats. Therefore, doing pull ups every day will have an amazing effect on these muscles. When they’re well developed, great lats make the waist look small and the shoulders look big. Lats are also crucial for keeping your back in a healthy position when you’re doing deadlifts, squats and bench presses.

Although, Your Gains May Not Be Proportional

Yes, your lats (and probably your biceps) will look awesome. But while they’ll be looking great, you can’t neglect your other muscles. You need to do other exercises to even out your legs, chest, and the rest of your arms and back. Having an underdeveloped lower back, traps and rear deltoids but massive lats is a slightly strange look, to say the least.

Doing Pull Ups Every Day Will Boost Your Grip Strength

Supporting your body weight for one pull up, let alone 50, requires some serious grip strength. It will be challenging at first, but within a week or two you’re likely to start seeing some major improvements. Many people find that their grip strength negatively impacts their pull exercises such as deadlifts, rows, and flies. So, your daily pull ups will help you in other areas of your fitness. And pretty soon, you’ll be the go-to jar opener among your friends and family.

You’ll Develop Great Muscular Endurance

When you commit to doing pull ups every day, your muscular endurance will skyrocket. This will also be helpful in other areas of your workouts, such as cardio and high intensity training. Your hard earned endurance will help you power through almost any other workout, which is super helpful.

But, You Won’t Be Resting Enough

Doing the same movement every day can take a major physical toll. If you get injured, you won’t be able to keep doing pull ups every day. As an athlete, it’s responsible to take rest days. Otherwise, you risk painful inflammation or torn and strained muscles.

Research shows that it’s best to allow muscle groups 24-48 hours to properly recover between workouts. You should absolutely not push through injury.

And You’ll Get Real Sick Of Doing Pull Ups Every Day

You won’t just be tired physically. You’ll feel some mental strain too. Most people who have committed to daily pull up challenges report really struggling with the mental side of it. Dragging yourself to the gym to do the same gruelling exercise over and over again is tough – especially when you’re overtrained and sore.

On the other hand, pushing through the pain may suit your personality type. You may find it really empowering to force yourself to get into the gym and do those pull ups every day for 3 months. At the end of those months, you’ll feel like a beast. One thing’s for certain though – doing pull ups every day is going to be tough. Consider the pros and cons carefully before diving into any daily exercise challenge.

Categories
Blog

How To Squat Deeper: The Quick Fix

We all want a deeper squat, right? I think having a great air squat position is one of the best things you can do to for your health and fitness. So, how to squat deeper – quickly and easily? We will get to that in one moment.

But first…

Please understand I am not saying you should forget about mobility. It’s important to keep trying to fix any actual issues in your squat.  This is just a quick way to give your squats some variety and help hit full depth if your mobility is not there yet.

With that out of the way, here’s how to squat deeper:

It’s all in the ankles

Did you ever notice how when you squat down and are on your tippy toes, like a catcher, that you can bring your heels to your butt? But when you try to keep your feet flat on the ground then your butt doesn’t even come close to your heels? What’s up with that? 

That’s called ankle mobility and is probably the number 1 reason you can’t squat deeper. You can do ankle mobility exercises to improve your squat. Or, there is a super simple fix.

So how to get a deeper squat? Simply elevate the heels.

The right way and the wrong way to squat deeper

Obviously, you shouldn’t be loading a heavy squat and then squatting down with all your weight on the balls of your feet. This would be the wrong way.

The correct way is by taking something thin, such as change plates or a small strip of rubber matting about ¾ of an inch or so, and placing it on the floor. Place your heels on whatever your item is and now squat. 

Your squat should instantly be deeper. It should also give your heels a solid platform to balance on and push against. This helps you to come out of the squat. Doing this is essentially the cheap version of lifters.

What are lifters?

Lifters are shoes designed specifically to give you a deeper squat position. 

They are used in the sport of Olympic lifting as well as CrossFit and general training. These shoes are designed to be very tight fitting and rigid. The sole is made of hard dense materials. This lets the athlete press out of the squat  without excessive foot movement.

Lifters can be beneficial to some athletes. But, in the words, of Louie Simmons, “Don’t have $100 shoes and a 10 cent squat”. What he means is that it’s best to focus on your form and mobility in your squat before going and spending money on high dollar lifters.

But remember, squat deeper with your ankles

For the longest lasting and healthiest fix, concentrate on your barefoot squat and increasing mobility and range of motion. 

Using lifters or poor-mans lifters can be very beneficial, and is just one more tool in our toolbox. Just don’t become reliant solely on that one tool.  

Categories
Blog

How To Make Wall Balls Easier

The wallball. Some love it, some hate it. Regardless of how much you do or do not enjoy it, they’re a great core exercise that we all want to be faster/better at. There are a few common areas where most people could make wall balls easier for themselves.

Problem areas

Okay, so you know how to do a basic wall ball. But there are always places to improve. There are 4 areas of the movement that you could work on and make wall balls easier for yourself. They are:

  • Hands
  • Depth
  • Drive
  • Rebound      

Hands

Where the hands go on the ball makes a huge difference. This alone will change how wallballs feel tremendously. 

Proper hand placement will be under the ball, with thumbs pointed back towards your face. The ball should be resting against your chin here as well. This places elbows almost directly under the wrist which is a very easy position to hold

Athletes often place their hands on the sides of a ball and then try to crush it between their hands in an effort to hold it. This flares the elbows and does not allow the athlete good power delivery to the ball.

The biggest issue with the side/crush grip is it usually means the ball sits lower. Instead of being chin/face level, it sits throat/chest level or even lower. This makes it almost impossible to keep the chest in the upright position we want it to be during a squat.

Depth

It’s common knowledge that not going low enough in a squat (hips past parallel of knees) will count as a ‘no rep’. So, athletes typically try to bottom out a squat in an effort to forgo the ‘no rep’. The effort is appreciated, however the athlete is wasting valuable time and energy here.

They not only spend the time reaching the full bottom of the squat, but now they have to spend the time reversing that distance. Moving their body weight and the ball through that space requires much more energy.

They also usually lose the tension in the core, knees, and back, which they must regain before completing the movement. This also uses energy we could be focusing elsewhere.

A good depth is hips just breaking the plane of parallel. Here the athlete is able to keep tension in the right areas and save time and energy on the descent and the drive.

Drive

Wallballs can appear to be a very arm heavy movement. And, done improperly, they are. The drive is what I call from the bottom of the squat until you release the ball again. Basically the upward movement.

Beginner athletes often try to use only the arms and heave the ball up to the proper mark. This is what causes more work for the athlete.

Most humans create the largest and most efficient power through their hips and from their leg drive. This is one of the great things about being bipedal. The drive is where athletes should be focusing on getting a super aggressive leg drive and hip pop. 

Try this: push the floor away hard, squeeze the butt and pop the ball up. This will help drive the ball to the mark with minimal effort from the arms. 

Hopefully, this will save the arms for another movement in the metcon.

Rebound

The rebound is just like in basketball. The ball comes off the wall and we are reaching out to take back control. Obviously rebounding with a medball and wall balls is totally different than basketball, but we still need to practice this movement.

Athletes will usually drive the ball up, arms outstretched and stand there waiting for the rebound. As their hands take possession, control and, most importantly, the weight of the medball they squat down.  

A Rx medball is relatively light considering most other weights CrossFit uses, but it is usually a high rep movement. And, after high reps, even 8, 10, 14, 20 pounds becomes tiresome. So how do we try to make this easier? 

It involves matching the speed of the ball’s descent. As the ball falls, the hands will receive it, but then we must squat in sync with the ball. The theory is, if you squat at the same speed as the ball, you are able keep the ball ‘weightless’ until you are on the drive.  

The one issue that can arise here is this can pull an athlete onto their toes. This can cause improper squat form and place them too close to the wall to effectively complete the movement. But as long as this issue is addressed it will no longer be an issue until the athlete becomes overly tired.

Key ways to make wall balls easier

Focus on perfecting your hand placement. Keep your hands under the ball with thumbs pointed toward you.

Don’t squat too deep. Just breaking parallel is fine.

Drive through the movement with your legs.

Squat in sync with the ball on your rebound.

If you can follow these four tips, it will make wall balls easier. Much easier!

Do you have any other tips or tricks for wall balls? If so, we would love to hear about them.

Categories
Blog

The Fitness Benefits of Gymnastics

Do you struggle with gymnastic movements? Is spatial awareness a complicated concept for you? Do you want to improve your lifts? Have you ever hit your head on the door frame, as you’re getting in the car?  If you answered yes to any of these questions, then effort training fundamental gymnastics, is your answer. You’ll be amazed at the benefits of gymnastics to your general fitness.

In How to Build World Class Fitness in 100 Words by Greg Glassman, 50% of the movements listed are gymnastics movements. On the CrossFit theoretical hierarchy of development, training gymnastics comes before weightlifting. Suffice it to say, whether you’re a beginner or an advanced athlete, there are many benefits of gymnastics.

Most people’s first thought when struggling with gymnastics movements is that they need to work their technique and mobility. Though those things are important, strength is usually something they need to build first. That can be accomplished in part by weightlifting, but weightlifters can also become stronger by improving their gymnastics skills. 

Benefits of gymnastics in CrossFit

The combination of functional movements is one of the beauties of doing CrossFit. Shoulder strength for handstand push ups can be improved by doing presses, but it can also be improved by doing handstand work.

If you want to improve your Olympic lifts, you might need to improve your core strength. Some great movements to increase core strength and stability include L-sits, planks and V-ups. 

Some other benefits of gymnastics are control, coordination, spatial awareness, movement quality and mobility.

But gymnastics isn’t fun!

Gymnastic movements aren’t always fun. Usually people want to spend time practicing their Olympic lifts or doing more “fun” skills. It’s not often that one wants to practice their kip swing, strict pull ups. How often do you hear people mention wanting to work on their air squat or push up form? 

A lot of times, we figure we have it down, but there is really a lot of room for improvement. CrossFit isn’t just about getting from point A to point B. The grace and skill it takes between points A and B of a rep will ultimately improve the proficiency of the movement.  

It takes time and dedication to fundamentals to really improve on some of the more “fun” movements and hit those PRs you’ve been chasing. 

If you’re struggling with a particular movement, or have a movement or PR goal that you’re chasing, get with a coach and schedule a personal training session. A knowledgeable and experienced coach will be able to provide not only a set of eyes to watch your reps, but also pointers and cues to correct mistakes.   

The coaches at Buffalo Nickel CrossFit can identify flaws in your movements and give feedback to address key fundamentals that might be lacking in your current training.  This way you are ready to crush those goals!

By Kari Reed

Categories
Blog

How To Do Burpees: The Buffalo Nickel Guide

Raise your hand if you love burpees! What? Nobody?! I agree. Even though I don’t love burpees, I also can’t say that I hate them. I actually don’t mind them at all. They’re not too bad, if you know how to do burpees.

I used to hate burpees. Yes, hate is a very strong word. In this case, it’s completely accurate. I considered burpees to be equal to the devil. They are one of the most challenging CrossFit core exercises.

If I’m being honest, I hated them because I wasn’t good at them and I just couldn’t ever get comfortable with the suck. If you know me, you know I don’t like it when things are hard for me. So, I set out to embrace them.

I embraced them by doing them. More specifically, I did a 100 burpee challenge

The challenge was set up to do one burpee on day one, two burpees on day two, etc.

If you miss a day or days, you have to make up ALL of the missed burpees plus the current day’s burpees to continue. For example, if you miss days 10, 11 and 12, then on day 13 you have to do 46 burpees. 

One day, I did over 300. One day I did over 400. One day I did over 600.

I completed the challenge, though, and today I don’t hate burpees. How could I possibly hate them when I’ve never again had to do 600+ burpees in a single day?!  

Here are a few things I learned about how to do burpees

1. They really aren’t that hard

Let’s be honest, they are nothing more than getting on the ground and then getting back up. When you’re up, get down. When you’re down, get up.

That day I had to do over 600, really made me see them differently. As soon as I stood up, all I had to do was get down. Once I was down, I just had to get up. 

Of course there is always technique, which I’ll address shortly, but the basics of a burpee aren’t hard. Get down and get back up.

2. You have to pace yourself 

That pace is going to be different for everyone. Things like fitness level, volume of burpees, whether you are combining them with other movements, etc, will determine your pace from workout to workout. 

Your pace should be the rate at which you can move as quickly as possible, without stopping. Burpees will get your heart rate up and your lungs burning so you have to find that point that you can continue to manage both without stopping.

Sprinting and stopping and sprinting and stopping is going to take you much longer to accomplish the same amount of work. Find that breaking point of moving as fast as you can, but not so fast that you have to stop…and then stay there.  

3. Technique is a key part of how to do burpees

There are many tips out there for how to do burpees. Here are some of my favorites.

When you get down, don’t stop in the middle, at the top of the plank, and then lower yourself. Rather, try to kick your feet back as you’re coming down and “catch” yourself in the bottom of the push up position. This is because it takes longer when you stop, it takes more effort to stop there, and you then have to do the decline of your push up, which is harder than just falling. 

When you get up, jump your feet wider than your hands and throw your hips up as you bring those feet up. When you go to stand up, go straight into your jump. Don’t stop at the stand, and then jump. Let your stand and jump be one fluid movement. 

Move as little as possible. I am all about efficiency and accomplishing a task with as little effort as possible. Flow as many movements together as possible. Step up and step down if you have to. 

4. Burpees are mentally taxing

It can be a real mental game for a lot of people.  There were far more people who started the 100 day challenge than people who completed it.

The burpee is very repetitive and it takes a lot of effort to complete just one, and they never go as fast as you want them to go so it can be frustrating. When you accept them for the challenge that they are, you can just get after it. 

Final thoughts

If you think burpees suck, embrace them. 

Embrace that you’re burning calories and getting a full body workout every time you do them. 

Embrace them because you’ll never need the Life Alert, if you’ll just do them. You’ll be able to get on the floor and play with your kids, your grandkids, your dogs, or whatever, and not have to worry about not being able to get up. 

So, the next time you see burpees programmed, embrace them. After all, you’re just getting down and then getting back up. 

By Kari Reed

Categories
Blog

Getting The Most Out Of Heavy Training Days

There can be a tendency among new CrossFit athletes and trainers to avoid heavy training days entirely or execute them incorrectly. However, CrossFit is a strength and conditioning program.

People sometimes characterize CrossFit by its programming of mixed-modal workouts for time (“met-cons”). However, this is a limited view. Heavy training days devoted entirely to strength training are essential to CrossFit and are integral to CrossFit’s prescription of constantly varied workouts. 

Why do heavy training days?

Heavy days are necessary to build top-end strength and power. Power output decreases with time. This meaning an athlete’s work capacity in a very short time domains sets the limit for his or her entire curve.

It is possible to have high levels of short-duration power and little power elsewhere (e.g., a powerlifter), but it is impossible to have low levels of short-duration power and higher levels of longer-duration power. Therefore, heavy days are essential to a general physical preparedness program. 

All of that said, it is important to understand that heavy days can be completed with most any weightlifting or gymnastics movement, such as weighted dips and pull-ups, or lifting odd objects (e.g., sandbags, tires). More often than not, a barbell is the best and simplest equipment for this task. The barbell’s ease and range of loading is impossible to match. Heavy days may also include all variations of standard barbell movements (e.g., hang, power, lifting from a deficit, pulls).

Heavy days are not the only time athletes can drive strength adaptations. Even within a metabolic-conditioning workout, depending on the task and capacity of the athlete, any number of exercises may build strength.

Push-ups for novices build pressing strength similar to a bench press. Attempting a 95-lb. thruster for a new CrossFit athlete builds squatting strength. As an athlete’s strength increases, however, push-ups and 95-lb. thrusters tend to favor other adaptations, such as stamina. Greater loads are necessary to further increase top-end power. 

Try a one rep max

Finally we can discuss the benefits from a one rep max. A one rep max is vital in helping achieve overall growth in strength. Whether it’s your first time setting a PR or surpassing a current one, it will help boost your heavy training days from now on.

Push your body a little harder by adding a few more pounds to your lifts. Over the next few months you will break down old plateaus. Eventually, at the next load week, you just might be surprised and see a new PR. Over time, with completing several different one rep max lifts, you’ll be so excited to review your year end records and see all the accomplishments you’ve had. And then, you’ll continue to set the bar a little higher.

Are you new to working out, and unsure about lifting weights in general?  Check out 7 reasons you should lift weights by clicking here.

By Nate Crodray

Categories
Blog

The Unsung Hero Of The Zercher Position

The name Ed Zercher probably means very little to most people in the world. However, Ed created what might be one of the best strength building techniques out there. He is hailed as the creator of the Zercher position, most commonly used in the Zercher squat.

There are plenty of articles out there about Ed, his legacy and movement ‘how-to’s. However, today we are just talking about the pros and cons. We also have some advice for adding the Zercher position to your workouts.

The Good:

Using the Zercher position (holding the barbell in the crook of the elbows) can be very beneficial. Here’s why:

  • Your upper back, especially the traps, will become stronger due to the forward position of the bar.  
  • Maintaining the correct posture during the movement requires bracing your core very firmly. This not only helps make your core stronger, but also shines a spotlight on a weak core.
  • The quads, glutes and biceps will all be activated in different ways due to the unique position of the barbell.
  • The position can be helpful or more comfortable for people with long limbs or a poor front rack position.

The Bad:

Like any movement, the Zercher position is not without its drawbacks.  

  • To get the bar into a Zercher position, you usually bring it up from the floor.  This can be listed under benefits if done properly. However, if done improperly it comes with some serious risks of injury.  I typically suggest loading this position from the rig to make it a little safer.
  • If you have a weaker core and lower back issues you might want to focus on building that core stability first before trying the challenging Zercher movement.
  • The Zercher position can make breathing difficult, due to the bar/arms pressing into the chest.
  • It can be uncomfortable on the arms, especially if using a standard barbell without any kind of padding. An axel bar will help this issue but only slightly. Personally, I usually label this as a positive aspect. This is because it creates an uncomfortable situation that forces you to accept the pain and work through it. However, I recognize that most people do not feel the same way.

How To Use The Zercher Position In Your Workouts

Pick one exercise a week to do in the Zercher position, and build up from there. As far as picking which movement, you have plenty of options. Squats, lunges, holds, carries, step ups, deadlifts – the list goes on.  

I will add a word of wisdom. If you are not used to them, go lighter than you think you need to.  These can bring out the inner baby of even the most seasoned lifter.

Not sure you are doing the Zercher correctly?  Contact BNCF today for your free intro.  As a member, you get access to world class coaching, convenient location and more.